What is a Contour plan?
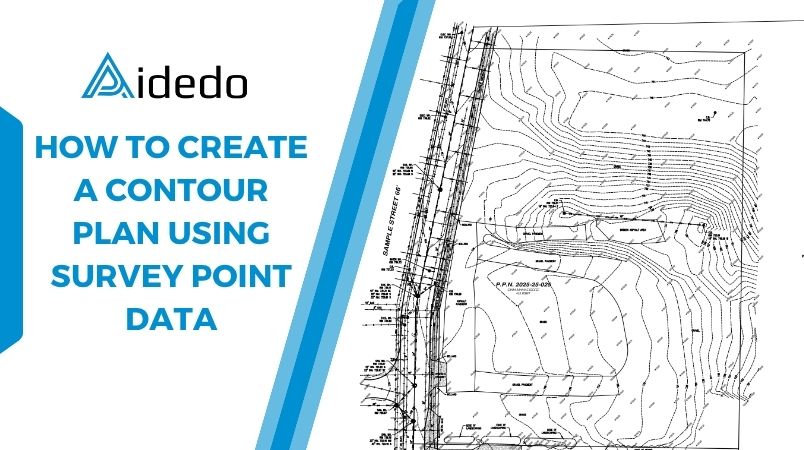
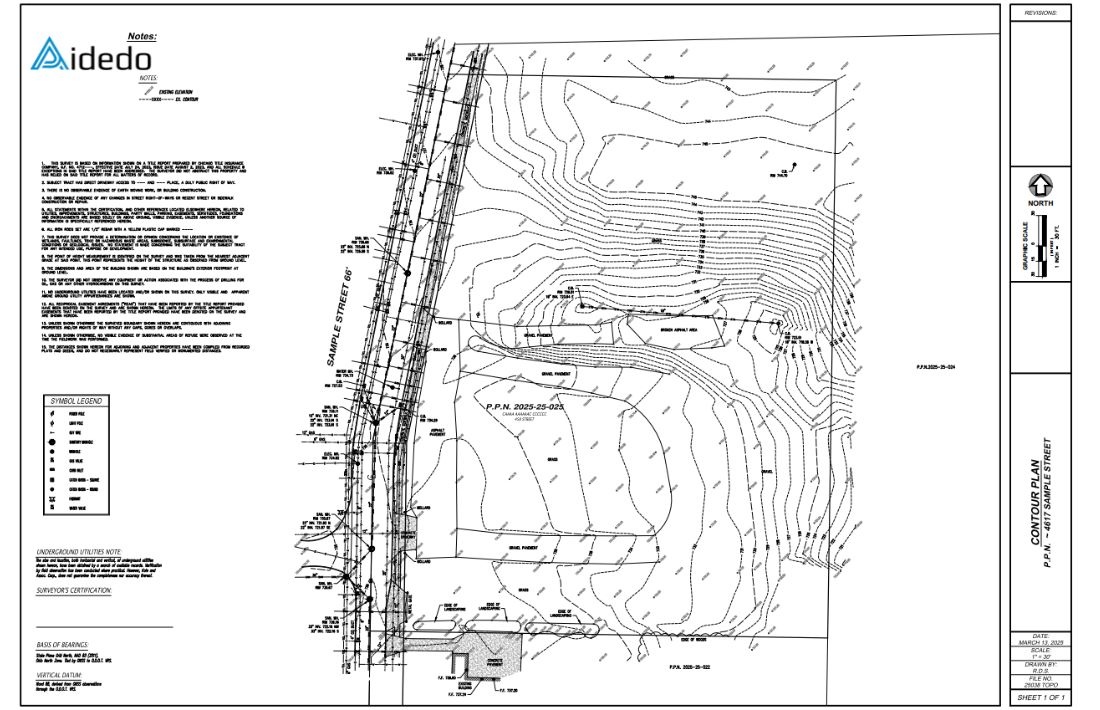
Unlike boundary surveys, which establish legal property lines, or topographic surveys, which document vegetation and manmade features, contour surveys focus specifically on the shape and elevation of the land surface. This information is essential for accurate grading design, drainage planning, and site development.
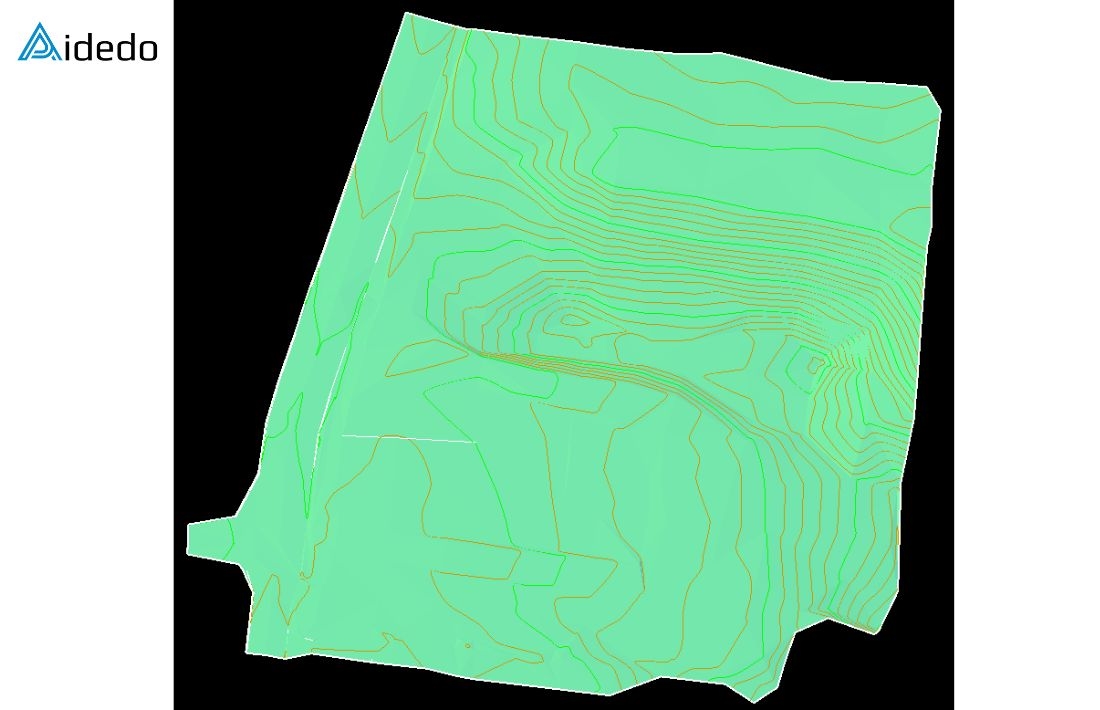
A contour survey is a type of land survey focused on capturing ground elevations across a site to represent the natural terrain. The final output is a contour map, which uses contour lines to connect points of equal elevation above a defined datum. Each line represents a constant height, and the spacing between lines indicates the slope gradient, when the spaces are close to each other, the terrain is steep while where the spaces are far apart it means there are gentle slopes.
Why is a contour plan important?
- Shows the Existing Terrain Clearly: This plan is created using natural surface data, collected before any site work begins. It shows where the land is high or low, the slope direction, and any valleys or ridges. This helps identify low areas that might flood or need drainage attention.
- Supports Grading and Site Design: With accurate ground levels, it’s easier to plan where to cut or fill. It helps choose the best location for buildings, roads, and driveways by finding the most level ground.
- Helps with Drainage Planning: Good contour data lets engineers design drainage systems that follow the natural flow of water. This helps avoid problems like water build-up, erosion, or unstable ground later on.
- Useful for Estimating Costs: Cut and fill volumes can be calculated directly from the natural surface. This makes earthwork cost estimates more accurate and helps plan the job more efficiently.
- Required for Council Approvals: Most councils ask for a contour plan as part of the building or development application. It shows that the design respects the existing landform and meets local planning rules.
How Contour Survey is Performed
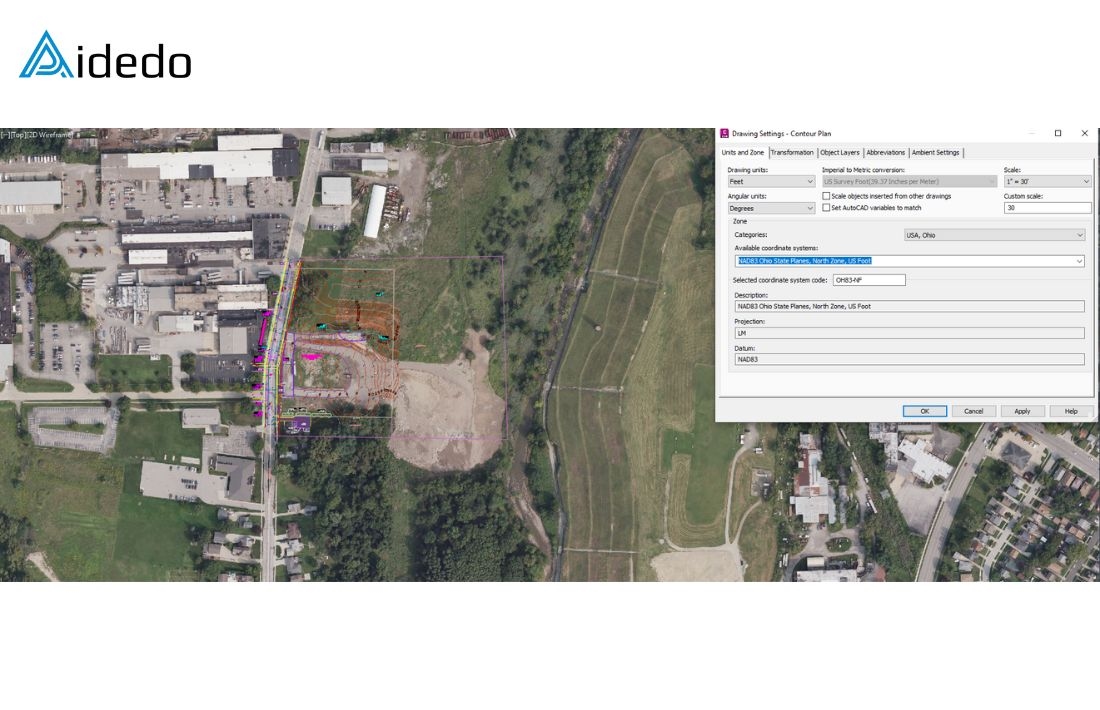
Step 1: Setup coordinate system
Start by setting the correct coordinate system in Civil 3D based on the project location. This ensures all imported data is properly georeferenced and aligns with other spatial datasets.
Read more: contour and detail survey drafting services
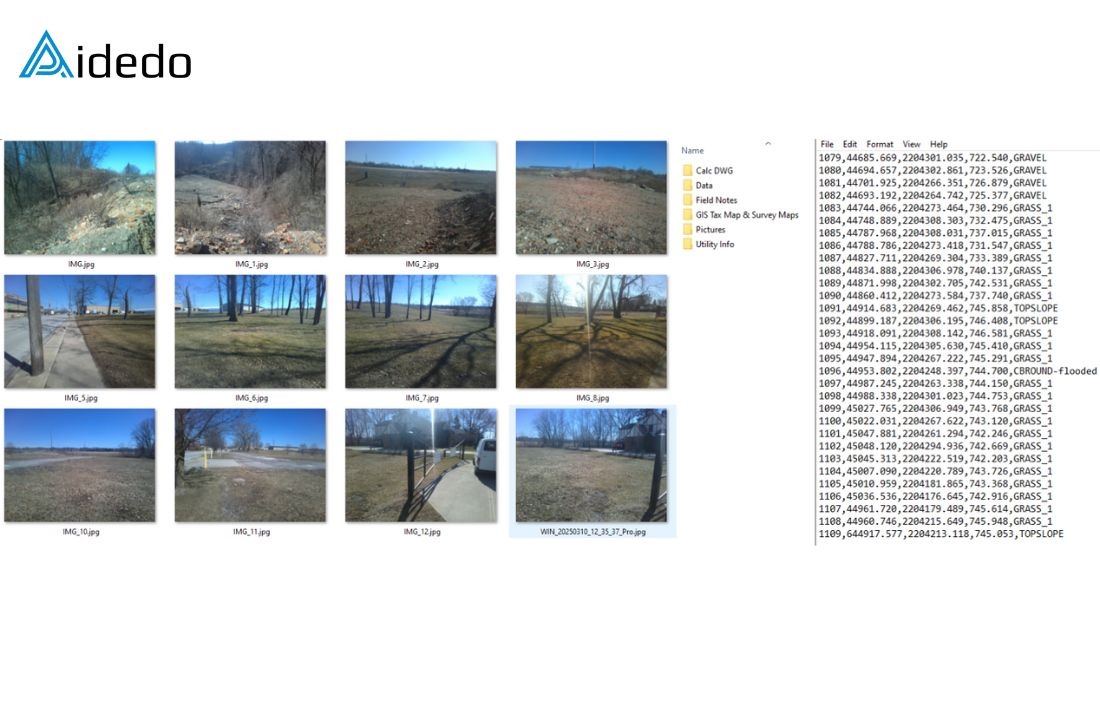
Step 2: Import survey points data into Civil 3D
Import the surveyed point data into the drawing. Points are usually provided in .csv or .txt format, including Easting, Northing, and Elevation values.
Check that:
- All points have valid elevations.
- No duplicate or missing data exists.
- Point styles and labels are applied correctly.
Step 3: Create the TIN surface
Create a TIN surface using the imported points.
Add point groups and breaklines if needed to reflect existing features like curb, gutter, or swale.
Ensure breaklines are added before rebuilding the surface to avoid flat triangulation in critical areas
Step 4: Create contour lines
Set the contour interval based on project requirements (commonly 0.5m or 1.0m). Civil 3D will automatically create both major and minor contours from the surface.
Apply the appropriate contour style and assign layers following client standards.
Read more: land survey drafting outsourcing services
Step 5: Add required information and finalize the drawing
Complete the drawing by adding:
- Spot elevations at key points (high/low spots, pad levels, etc.)
- Boundary lines and any existing features (from the subdivision plan or title)
- North arrow and scale bar
- Title block with project details, drafter name, date, scale, units and drawing name
Step 6: Internal cross-check and final submission
Once the drawing is completed, an internal cross-check is conducted to ensure accuracy and consistency. The Project Manager then performs the final review to confirm that the drawing meets client requirements, complies with the project scope, and is ready for delivery.
After all reviews are complete, the final files are exported in both DWG and PDF formats and submitted to the client.
Send your request today via email at contact@aidedo.com or fill out the form below to get 1:1 direct consultation, receive transparent quotes, and enjoy a completely free service trial for your first project. With our professional process, rapid 24-hour deployment, and quality trusted by over 1,000 global clients, Aidedo is committed to delivering the most effective, accurate, and optimized solutions for you.

